15.04.2021

Avery Elle … Peek-a-Boo Flight

Hello, it’s Caryn here today sharing a fun card featuring the cute-as-all-get-out Peek-a-Boo Flight stamps and dies.  I adore the Peek-a-Boo line of stamps – they are so creative and unique – love all the new ideas Heather keeps coming up with!

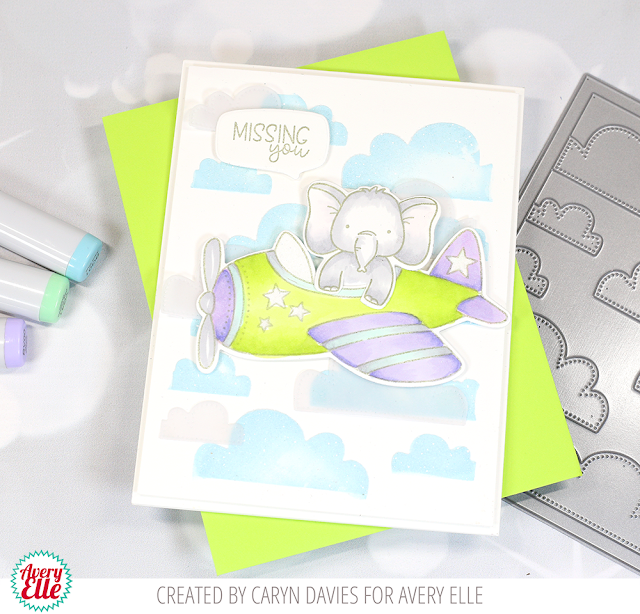
I created a textured card base for my design by using the Cloud Mat die to create a stencil.  I just cut it from card stock – a great way to get even more bang for your buck when it comes to your supplies!I took some embossing paste and tinted it with an ink refill to create a blue paste then slathered it over the stencil. onto a panel I sprinkled some fine clear glitter over it whilst it was still wet – glitter never shows up well in photos but I promise you, it’s super-sparkly!I also die cut some clouds from vellum to add even more dimension!

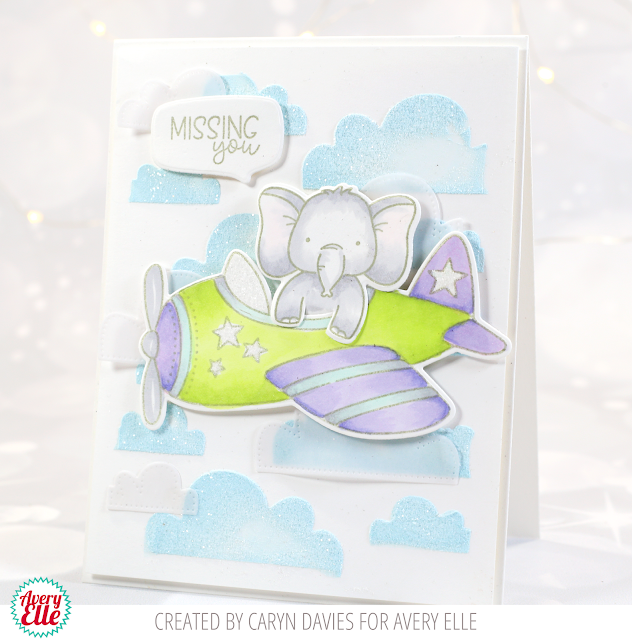
Whilst the card panel was drying I stamped and coloured the aeroplane from the Peek-a-Boo flight set and chose the elephant from the Sending Hugs stamp set.  For the sentiment I pulled out one of the older (and incredibly useful) sets, the Speech Bubbles stamps and dies.  
Because I had a wee bit of the paste left I thought I’d create another card to use it up!  I used the same stencil and made a small panel which fitted nicely onto a 4-bar card.  I thought it would be a great back drop for the Some Bunny Loves You stamp set.
I have a reel on my instagram page (@glittermesilly) showing a quick demo of how I created the stencil and cards if you’d like to see it in action!!!

Supplies:
Card 1

Peek-a-Boo  Flight Clear Stamps

Peek-a-Boo  Flight Elle-ments

Cloud Mat Elle-ments

Speech Bubbles Clear Stamps

Speech Bubbles Elle-ments


Card 2

Cloud Mat Elle-ments

Some Bunny Loves You Clear Stamps

Some Bunny Loves You Elle-ments

08.04.2021

Avery Elle … Everyday Tags (with cake)

Hey there! I have a new card (and tag) up on the Avery Elle Stamps blog that I created using the Everyday Circle Tags stamps and dies  (Holiday Circle Tags) paired with the A Cake for All Seasons set.  

I created the card by firstly blending some Kitsch Flamingo Distress Oxide ink onto the card base and splattered some Distress Spray over the top along with some stamped hearts from the Everyday Circle tags stamp set.  I put this aside to dry then worked on my cake focal point.

I stamped the cake with the frosting dripping down over top along with the various other “treats” I wanted to decorate my cake with. I then coloured them using Zig Clear Colour Brush markers for a water-coloured effect.  I die cut a circle from white card using the Holiday Circle Tags die and the scalloped mat from vellum.  I adhered them to the front of the card and added some shimmer with a Wink of Stella brush marker.

I finished by stamping the Happy Birthday sentiment onto the card front.

To go along with my card I thought I’d actually create a tag with the tag set!!  I filled a clear gift box with some Percy Pig sweets (if you’re in the UK you’ll know what I’m talking about – YUMMM!) I cut a tag and stamped the same Happy Birthday sentiment I used on the card onto the tag and finished it off with a satin ribbon!

Supplies:
Everyday Circle Tags Stamps

Holiday Circle Tags Elle-ments

A Cake For All Seasons Clear Stamps

A Cake For All Seasons Elle-ments

Distress Oxide Ink – Kitsch Flamingo

(Affiliate links used at no cost to you xxx)

07.04.2021

Pinkfresh Studio … Happy Birthday

Hey there! Today I have a card using some of my newest purchases that I recently added to my collection. I have been a big fan of Pinkfresh Studio since the beginning but for some reason didn’t own lot of their products. My mojo has been in a bit of a slump for the last year or so but I have found that lately I have felt much more creative so have added lots of new things to pump those creative juices to the max!

All the fabulous products I’ve used are available from Ellen Hutson.com

This card used the Colour Block Rainbow Die and the FABULOUS Painted Peony Washi Tape and die. These products are a marriage made in heaven, don’t you think?

I started with a white A2 card base and blended some Delicata Gold ink around a mask of the rainbow shape. I wanted it to look like there was a golden “glow” emerging from around the rainbow! I then die cut the rainbow from Tim Holtz watercolour card and used my Karin markers (a Mother’s Day gift) to add soft colour to each of the bands by scribbling onto my Mini Media Mat from Waffle Flower and dragging the watered-down colour to give a subtle gradient.

I cut the rainbow a second time from Bazzil Gold Coins cardstock (my FAVOURITE gold card of all time) and pieced the coloured bands into the outline of the rainbow. I replaced one of the bands with gold too!

Next I adhered the Painted Peony Washi Tape (be still my heart) onto some Neenah Solar White 110lb cardstock and ran it through my Gemini Jnr. I adhered the rainbow and then the smaller floral images along the bottom and into the left corner using liquid glue and foam tape. so that there was some dimension.

Finally I added a spritz of gold spray (I used Heidi Swapp but it appears to be long gone) and then added a Happy Birthday die cut sentiment using the FANTASTIC die set Classic Words ( I will use this SO MUCH).

I LOVE how it cuts the words and the shadow – perfect!

If you’re still here, thanks for visiting!