11.05.2017

Avery Elle Summer Release Blog Hop

It’s that exciting time again – a brand new Summer Release from Avery Elle Stamps!  I am so happy when the new goodies are finally available and we can start sharing all the fun projects we’ve been working on.  I have designed 2 new stamp sets and coordinating Elle-ments in this release and am thrilled to be showcasing them today in this amazing blog hop.  You should have jumped here from my fabulous friend Karolyn Loncon’s blog but if you want to start at the beginning (and you really should) then go HERE to the Avery Elle Blog.
Right, so onto my creations!  The first of the two sets I’ve designed this time is called Floral Bouquet.  It has a bunch of flowers as a large single stamp and then other elements such as leaves and buds so you can create your own display!  I’ve made 2 cards each time pairing the flowers with one of the amazing new frame dies from the release (going to the very top of my “must-have” die list by the way).  On the first card the images are stamped in New Moon Dye ink and then coloured with Copics  and finished with a coating of Spectrum Noir shimmer.
Floral Bouquet 2
The flowers on this second card were stamped in Versamark then heat embossed in white.  I used Kuretake Tambi Gansai water colours this time and used a blue card base to complement the images.
Floral Bouquet 1

Avery Elle / Jamie
Karolyn Loncon
Caryn Davies
Heather Campbell
Yainea
Melania Deasy
Katie Gehring 
Amy Kolling 
Ashley Marcu
Maska Vanacker 

To celebrate our Summer 2017 Release Blog Hop, Avery Elle is giving away a $25 Gift Certificate to one random winner.  To enter to win just comment on this post.  There is no purchase necessary and you must be 18 years of age or older to enter.  This giveaway is void where prohibited.  You can also do options 2, 3, 4, 5 or all 6 of the following to increase your chances of winning. You have until midnight Sunday, May 14th to enter.  The winner will be announced on the Avery Elle Blog on Monday, May 15th .  All products are available for purchase in the Avery Elle store right now.
To enter to win you can do 1, 2, 3, 4, 5 or all 6 of the following to increase your chances:

  1. Comment on any of the design team’s posts and/or here on the Avery Elle Blog
  2. Follow us on Twitter and tweet the contest (we are @averyellestamps )
  3. Follow us on Facebook (we are www.facebook.com/AveryElle ) and share us with your friends – make sure they tell us you sent them.
  4. Follow us on Pinterest
  5. Become a blog follower through email (comment on the Avery Elle blog if you already follow us)
  6. Join our Flickr group (comment on the Avery Elle blog if you already belong)
18.02.2015

Simon Says … Add a little texture.


wed-newchallenge-header

Hi all and welcome to another week on the Simon Says Stamp Wednesday Challenge

Thank you for joining us for the All Creatures Great And Small Challenge and we hope you will all join us again this week too.

This week the challenge is

ADD A LITTLE TEXTURE

We are showcasing our very own SIMON SAYS STAMP EXCLUSIVE PRODUCTS this week. You don’t have to use them to join in but if you have some we would love to see them used

As always Simon Says Stamp will be giving away $50 voucher to shop at the fabulous Simon Says Stamp Store

50dollar_voucher_600px

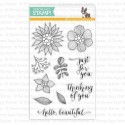
When I thought of texture I was immediately drawn towards my embossing pastes and stencils.  Then I thought I’d go and dig about in my stash and came across some jars of Ultra Thick Embossing Enamel (UTEE) that I’ve had sitting about for YEARS.  I haven’t really played with it in forever and I even found I had a jar of white UTEE that I’d never even opened!!  I took my Simon Says Stamp Large Tag dies and cut one from thick coaster board.  I used Versamark and gave it a good coat of ink and then poured on my first layer of white UTEE.  I heat embossed it and then repeated it 4 more times.  I wanted to “impress” my image into the UTEE so I took the Summer Garden stamp set and inked up one of the flowers and leaf images with Simon Says Stamp Mint dye ink.  I then heated the UTEE again so it was liquid and then carefully (but quickly) stamped the images on it in one go.  You then have to leave the stamps in place while the embossing enamel cools and then you can carefully peel them away. This technique isn’t the easiest to do as you need to be quite quick with your stamp block to get a deep impression – the UTEE starts to cool down quite quickly!  I love the finished look you get – I think I’ll be playing a bit more with my enamels in the future!  Incidentally, you can achieve the very same effect with normal embossing powder – you just need to add few more layers!

Texture SSS

For the rest of the card I created a white A2 card base from Neenah white card and cut a panel from Simon Says Stamp Mint cardstock.  I splattered the card with some Mister Huey Calico Shine to try to mute the colour down a bit.  It was still a bit vibrant for the effect I was after so I cut a piece of vellum and tore one edge to reveal the card stock underneath.  This softened the Mint colour  so it didn’t overpower the focal point of the card.  I finished with some enamel dots from My Mind’s Eye 🙂


So now it’s YOUR turn, Happy Crafting
 
You have until Wed  8am Ohio time. 1pm UK time, 2 pm CET to join in
No backlinking allowed, Only 5 new creations will be eligible in the prize draw

word-verif


05.02.2015

Sketched Blooms

Hello again.  I’m back today with one more card before the Clearly Besotted February 2015 release goes live tonight at 10pm BST.  Today I’m featuring the amazing Sketched Blooms stamp set and it is beautiful.  I fell in love with this set as soon as I saw it and knew it was screaming to be watercoloured.  This time I went with distress ink rather than water colour paints.  I used Spun Sugar and Picked Raspberry (I think they’re probably my two most used distress colours), dabbed them onto a craft sheet and then spritzed the ink with water.  I stamped two large and one small flower in Versamark onto Tim Holtz water colour paper and then heat embossed them in white before die cutting them.  I then coloured the flowers in quite loosley to give a pretty, delicate tint.  I repeated this for the leaves using Peeled Paint distress ink.  For my card base I wanted to have more than just a plain base so to echo the softness of the flowers I cut a panel out of an A2 Neenah white card base and “joined” the front of the card back together with a panel of thick vellum.  By anchoring the flower cluster over the gap the card is given back it’s strength and so doesn’t collapse.

sketched blooms


I stamped the Hello sentiment also from the set (LOVE that font) in Fog pigment ink from Avery Elle (such a gorgeous shade of grey).  To finish the card I added a few splatters of Mister Huey Calico Shine and a few wee sequins (because … sequins).

Thanks for visiting – I really hope you’ve enjoyed this release and I can’t wait to see the cards around blogland once they start shipping.  Don’t forget to check out Steph and the rest of the design team for lots more inspiration.